How-To GUIDE

How to Activate New Sensors

To activate new sensors, including climate stations and substrate sensors, please follow the steps below:

Before you start: Your Gateway must be active. Activate your Gateway first.
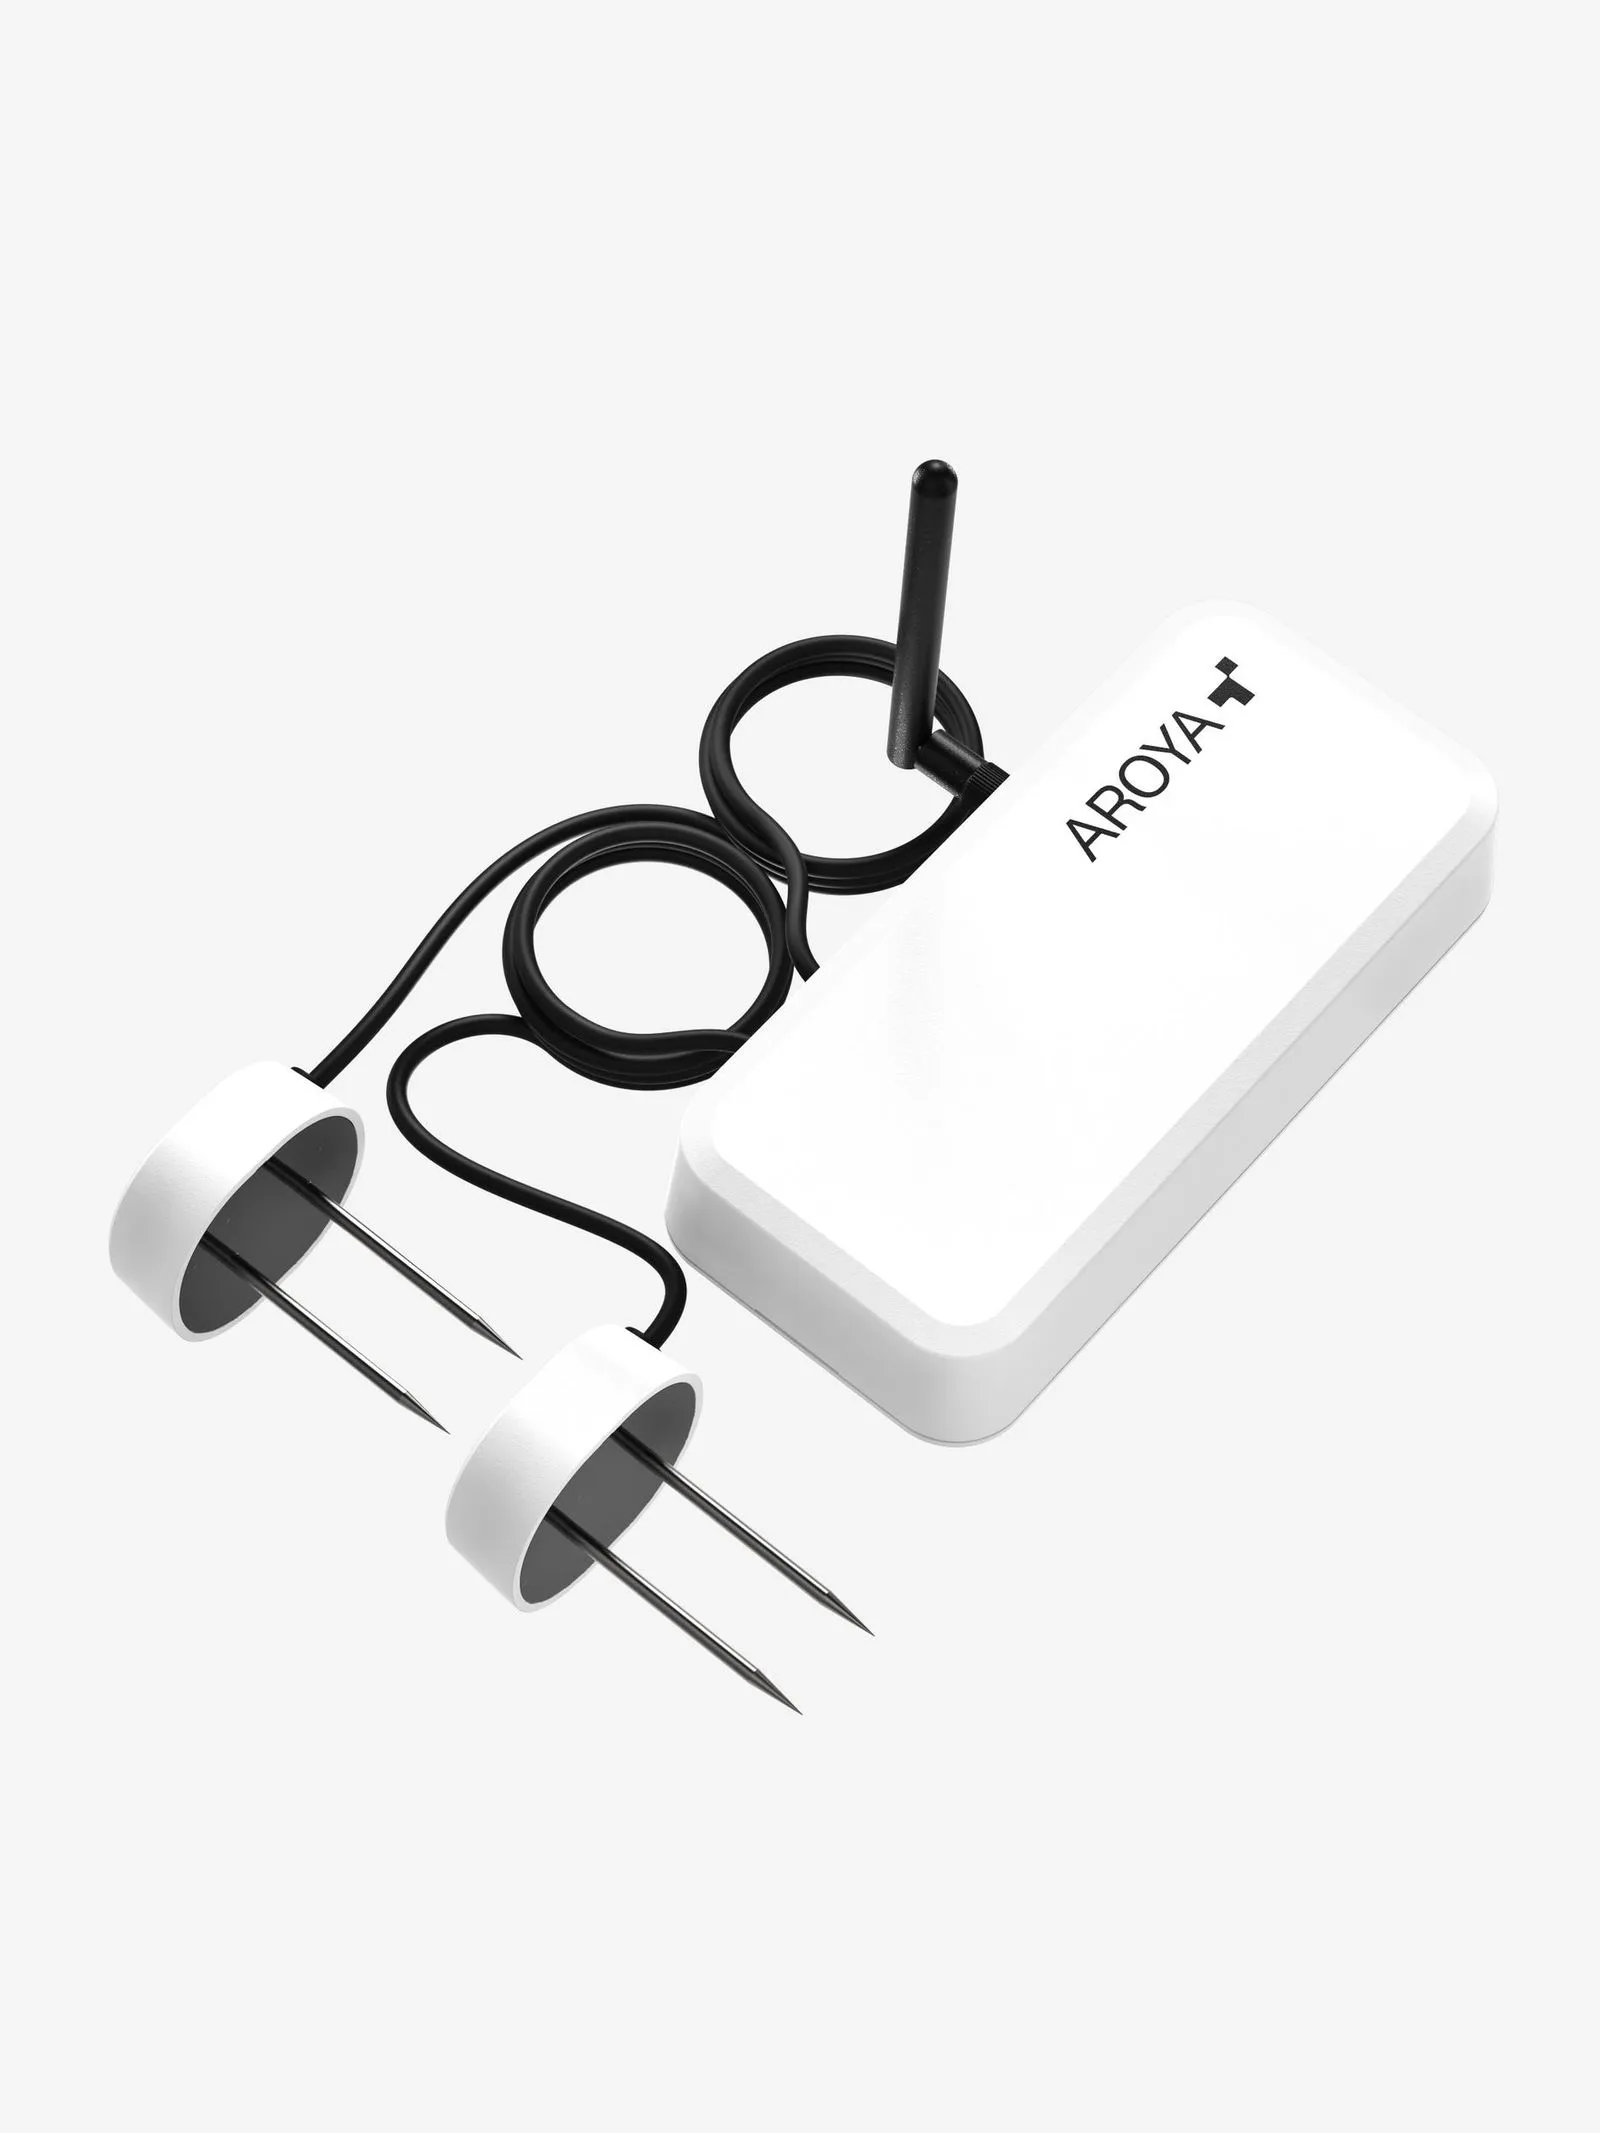
Two AROYA TEROS ONE substrate sensors connected by cable to a white AROYA device.
STEP 01

Collect devices

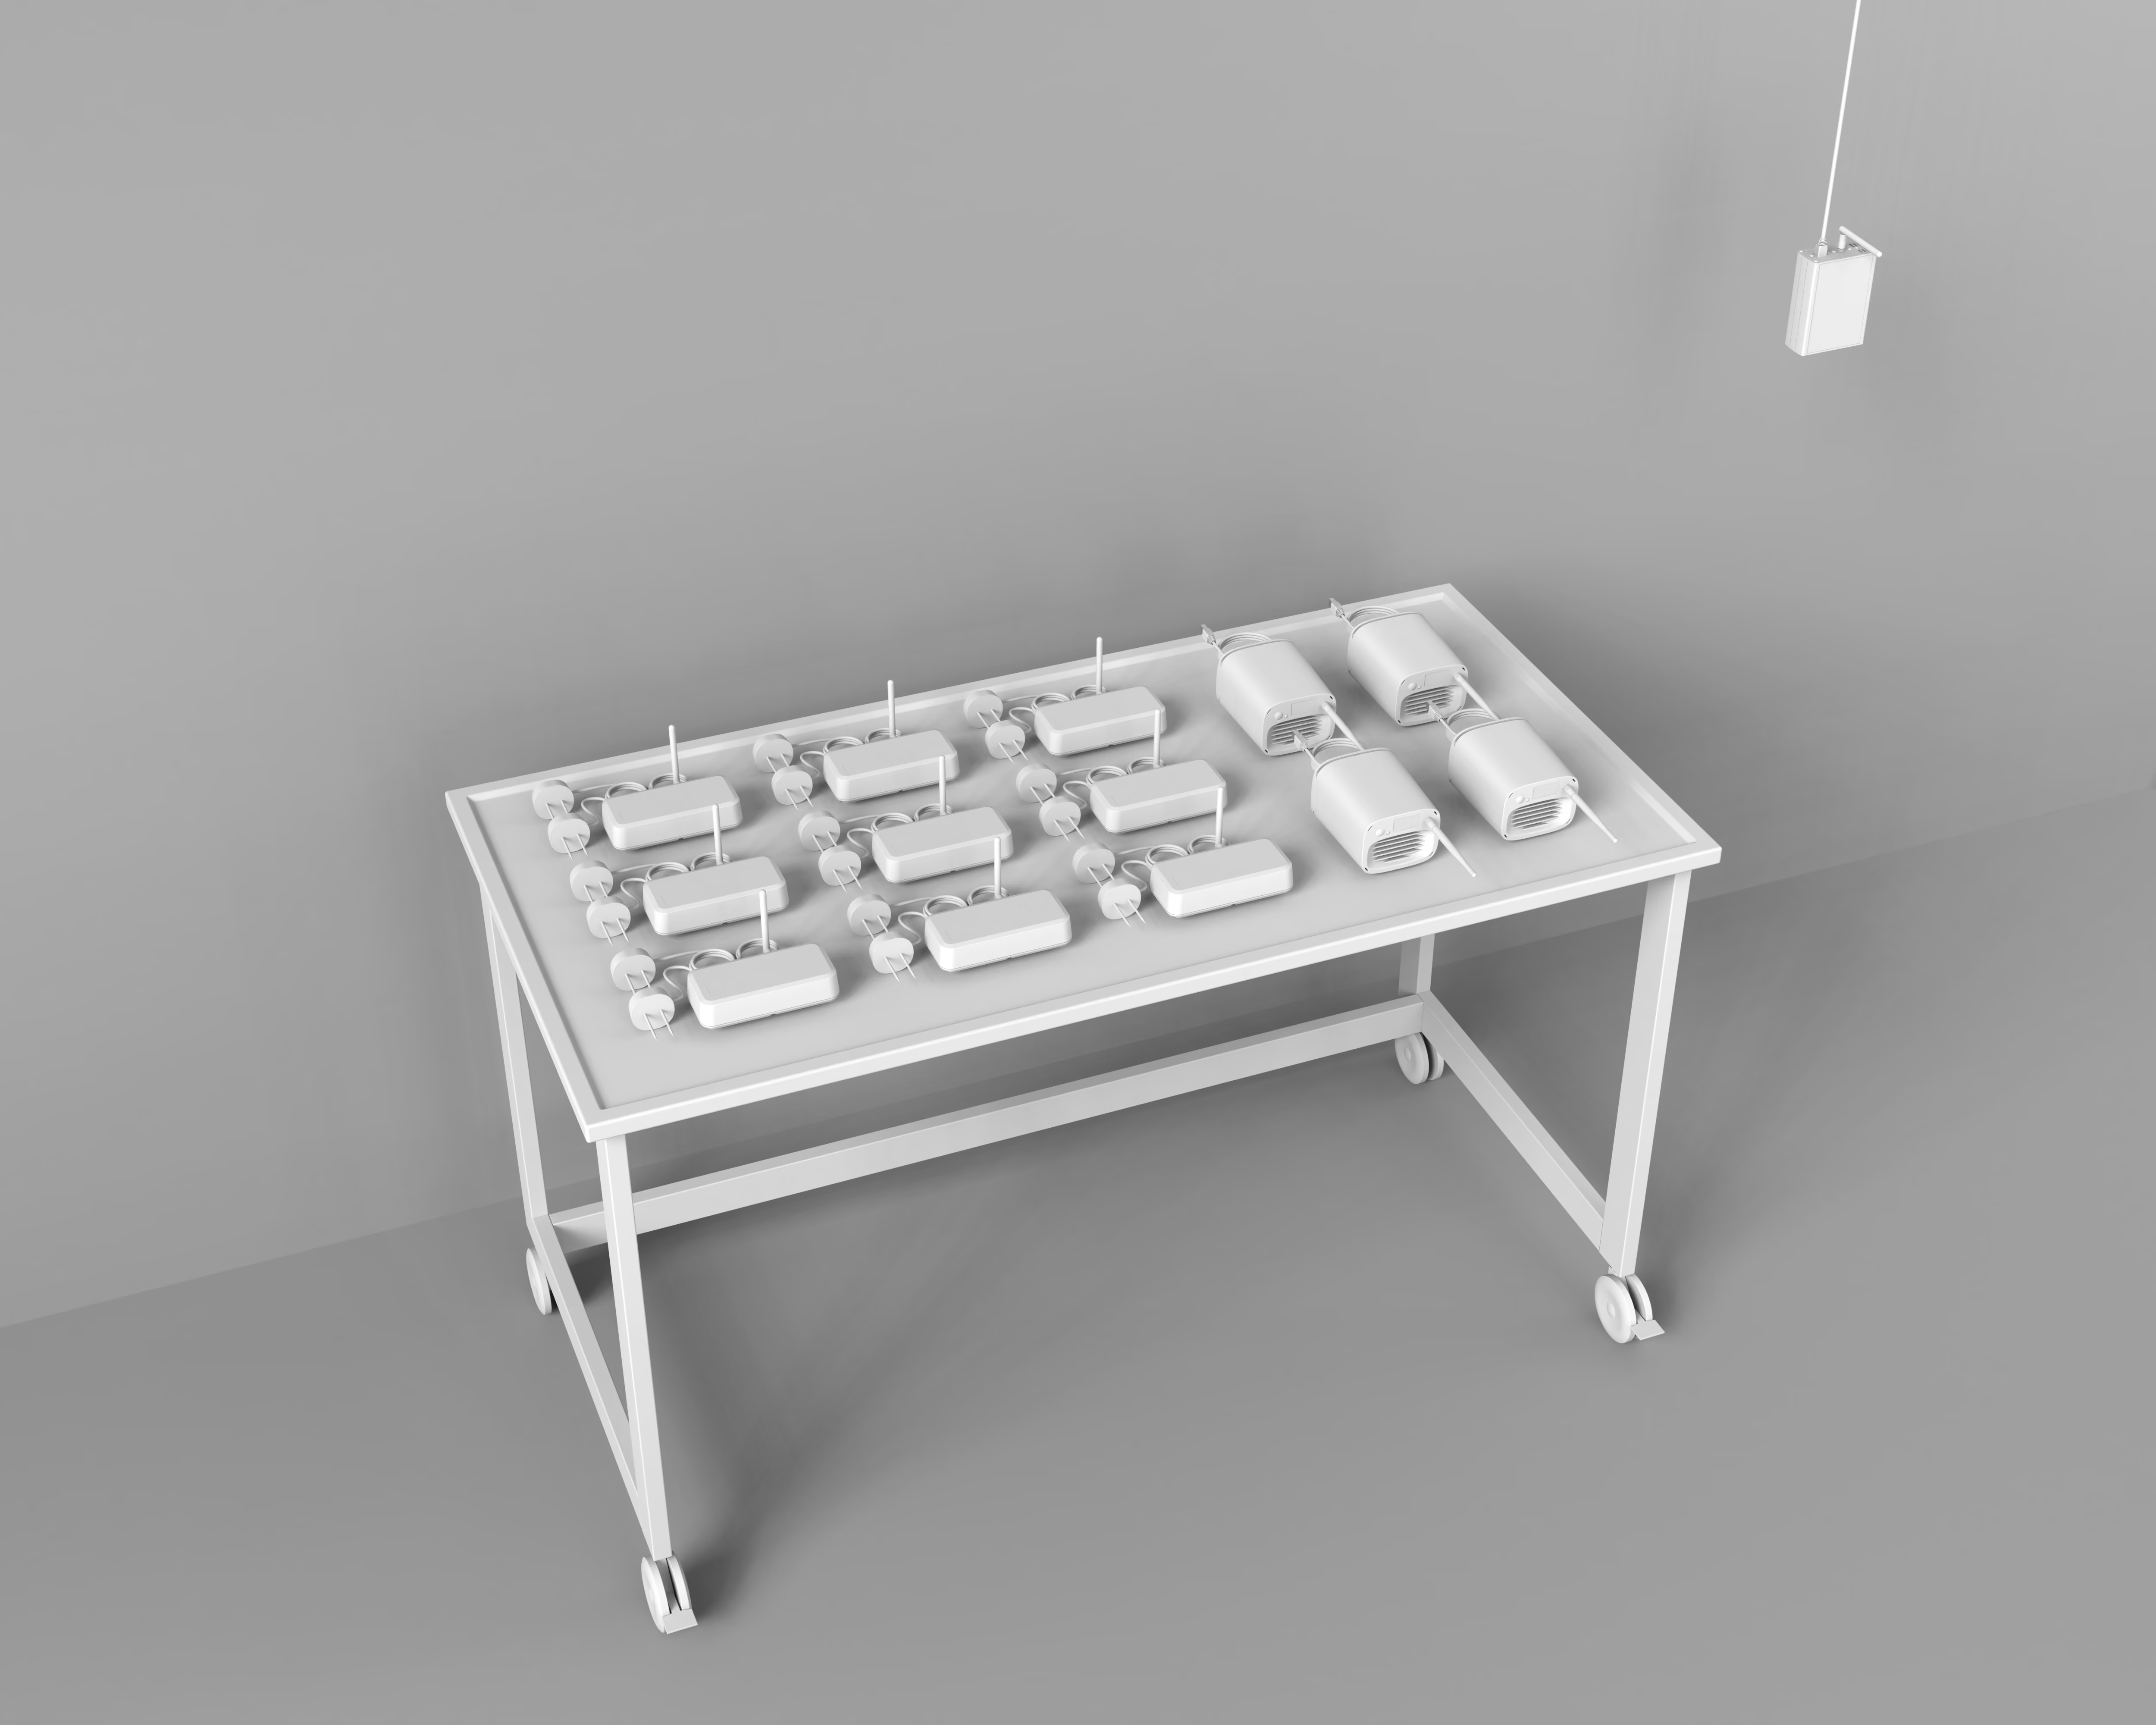
AROYA climate station and substrate sensors staged together within 10 feet of an active AROYA Gateway in preparation for device activation.
  1. Place devices within 10 feet of active Gateway
STEP 02

Connect climate stations to power
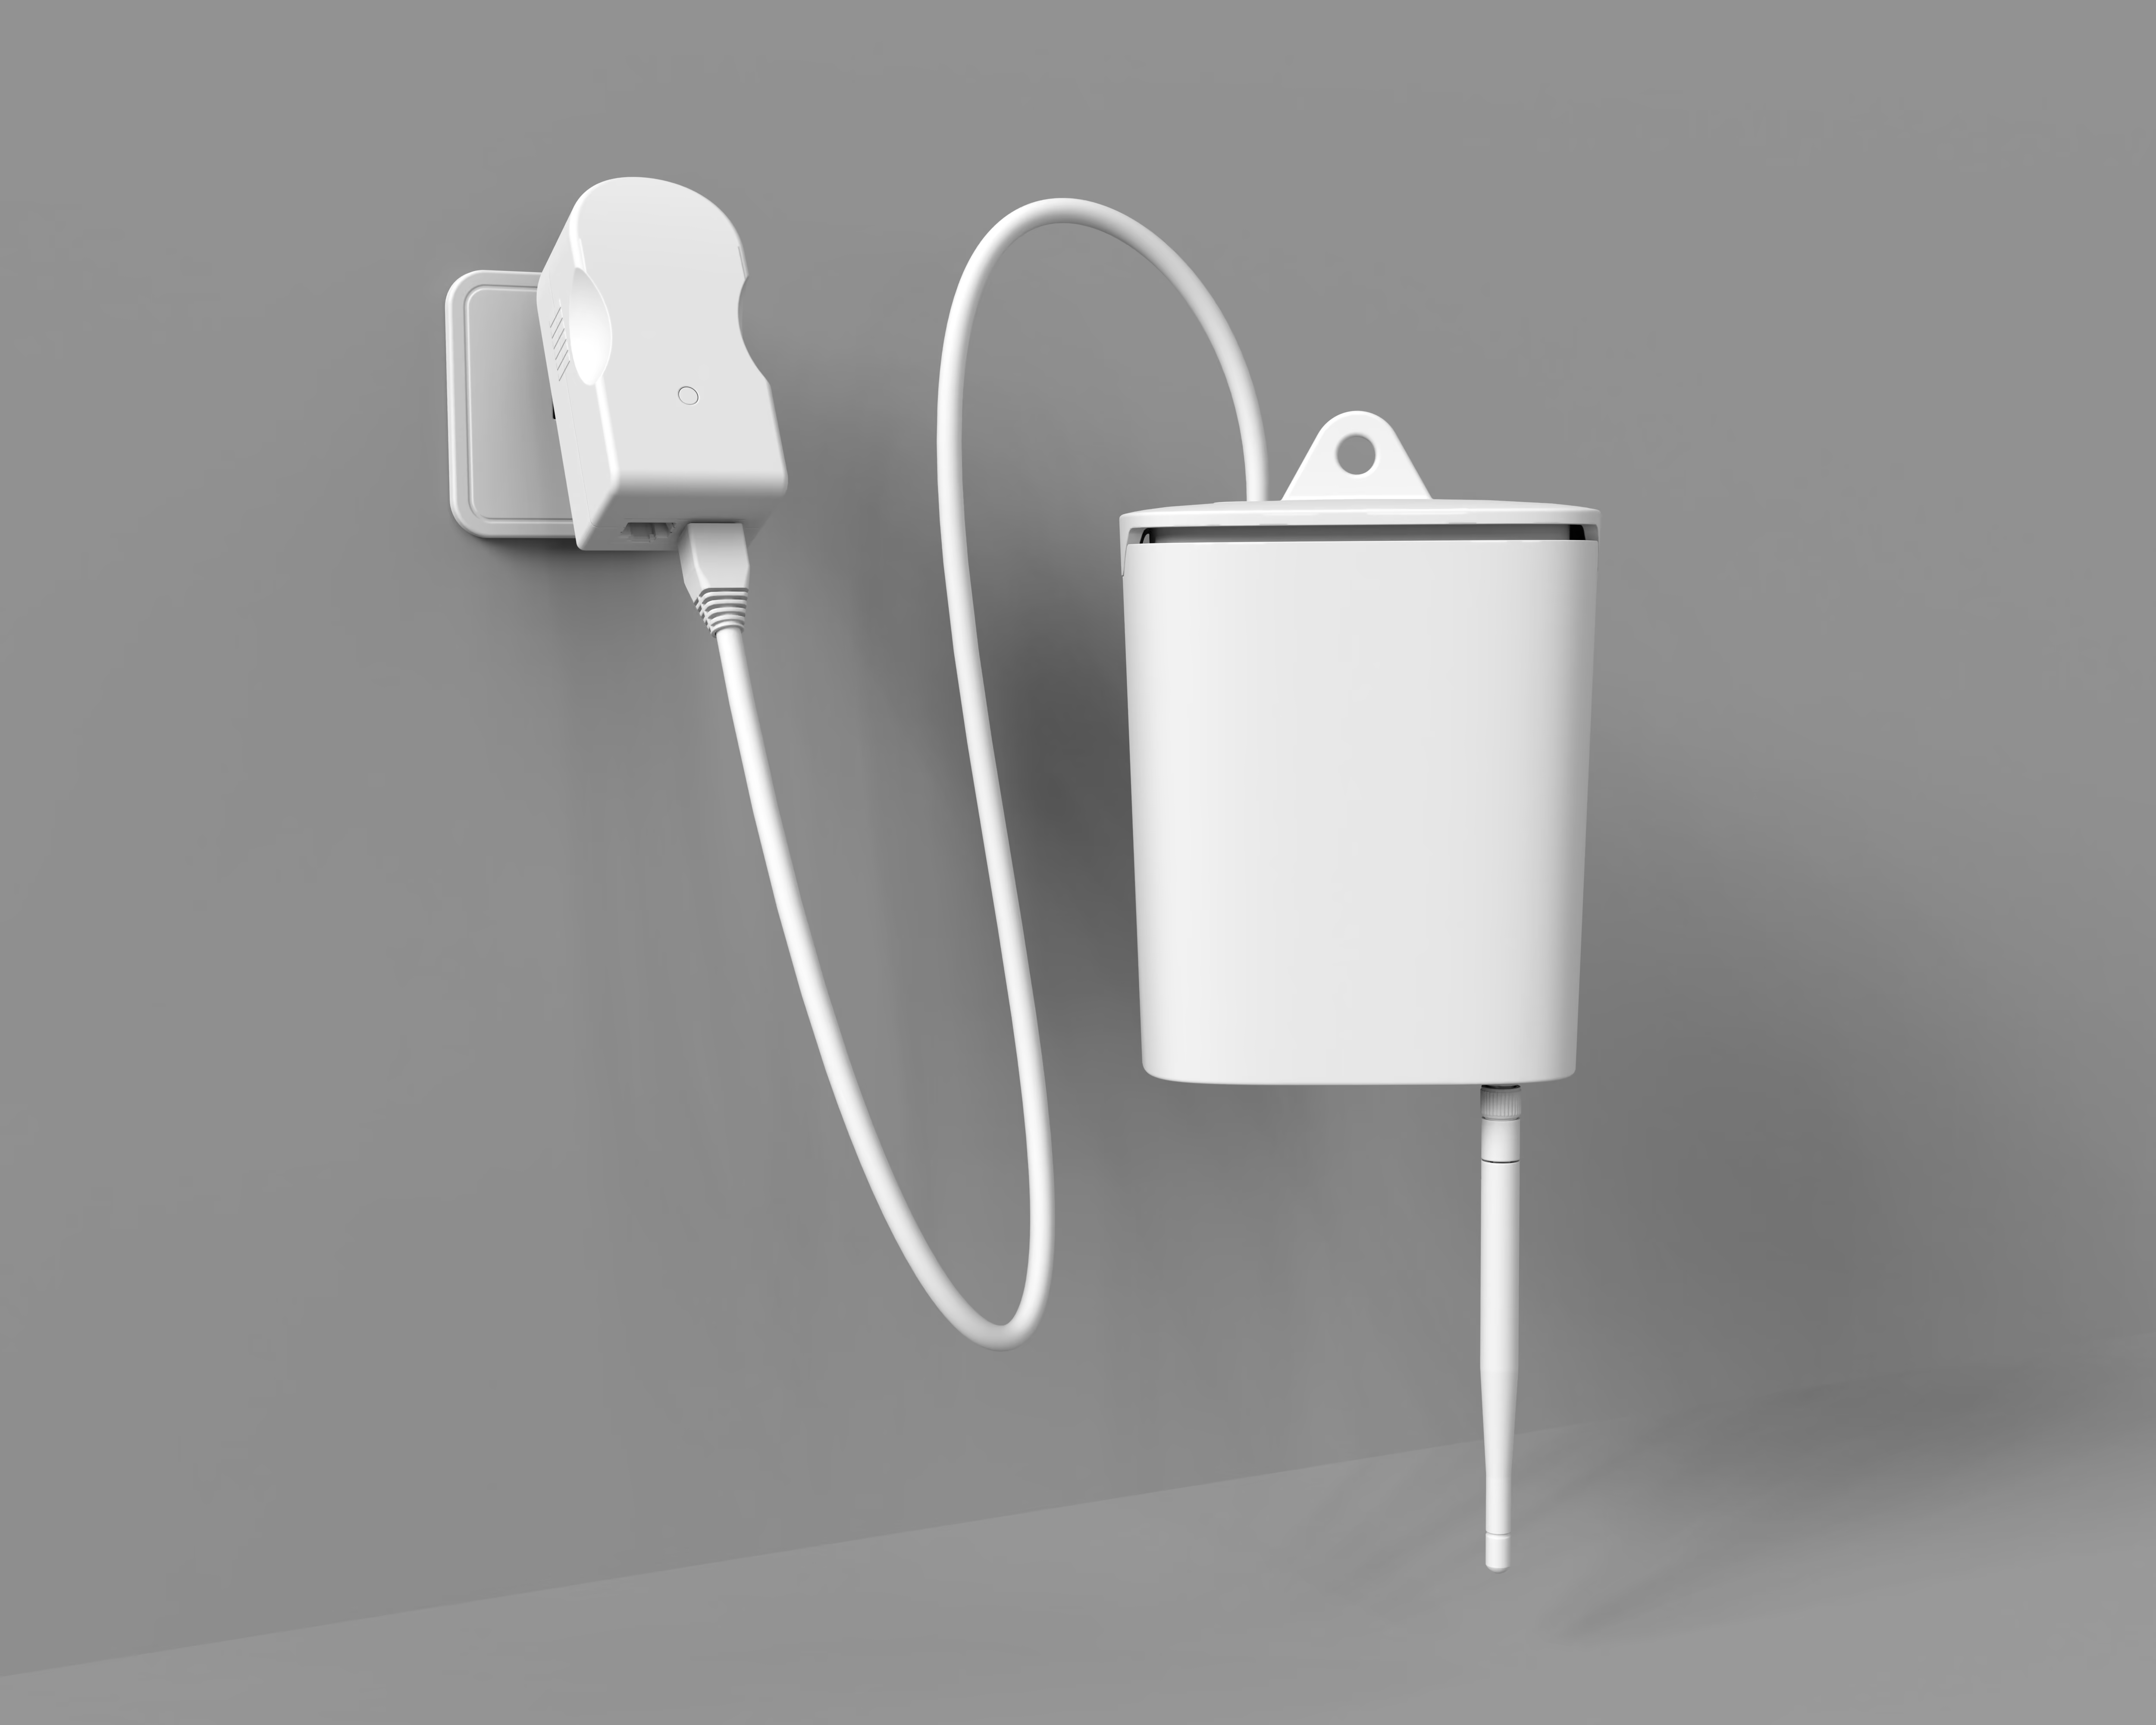
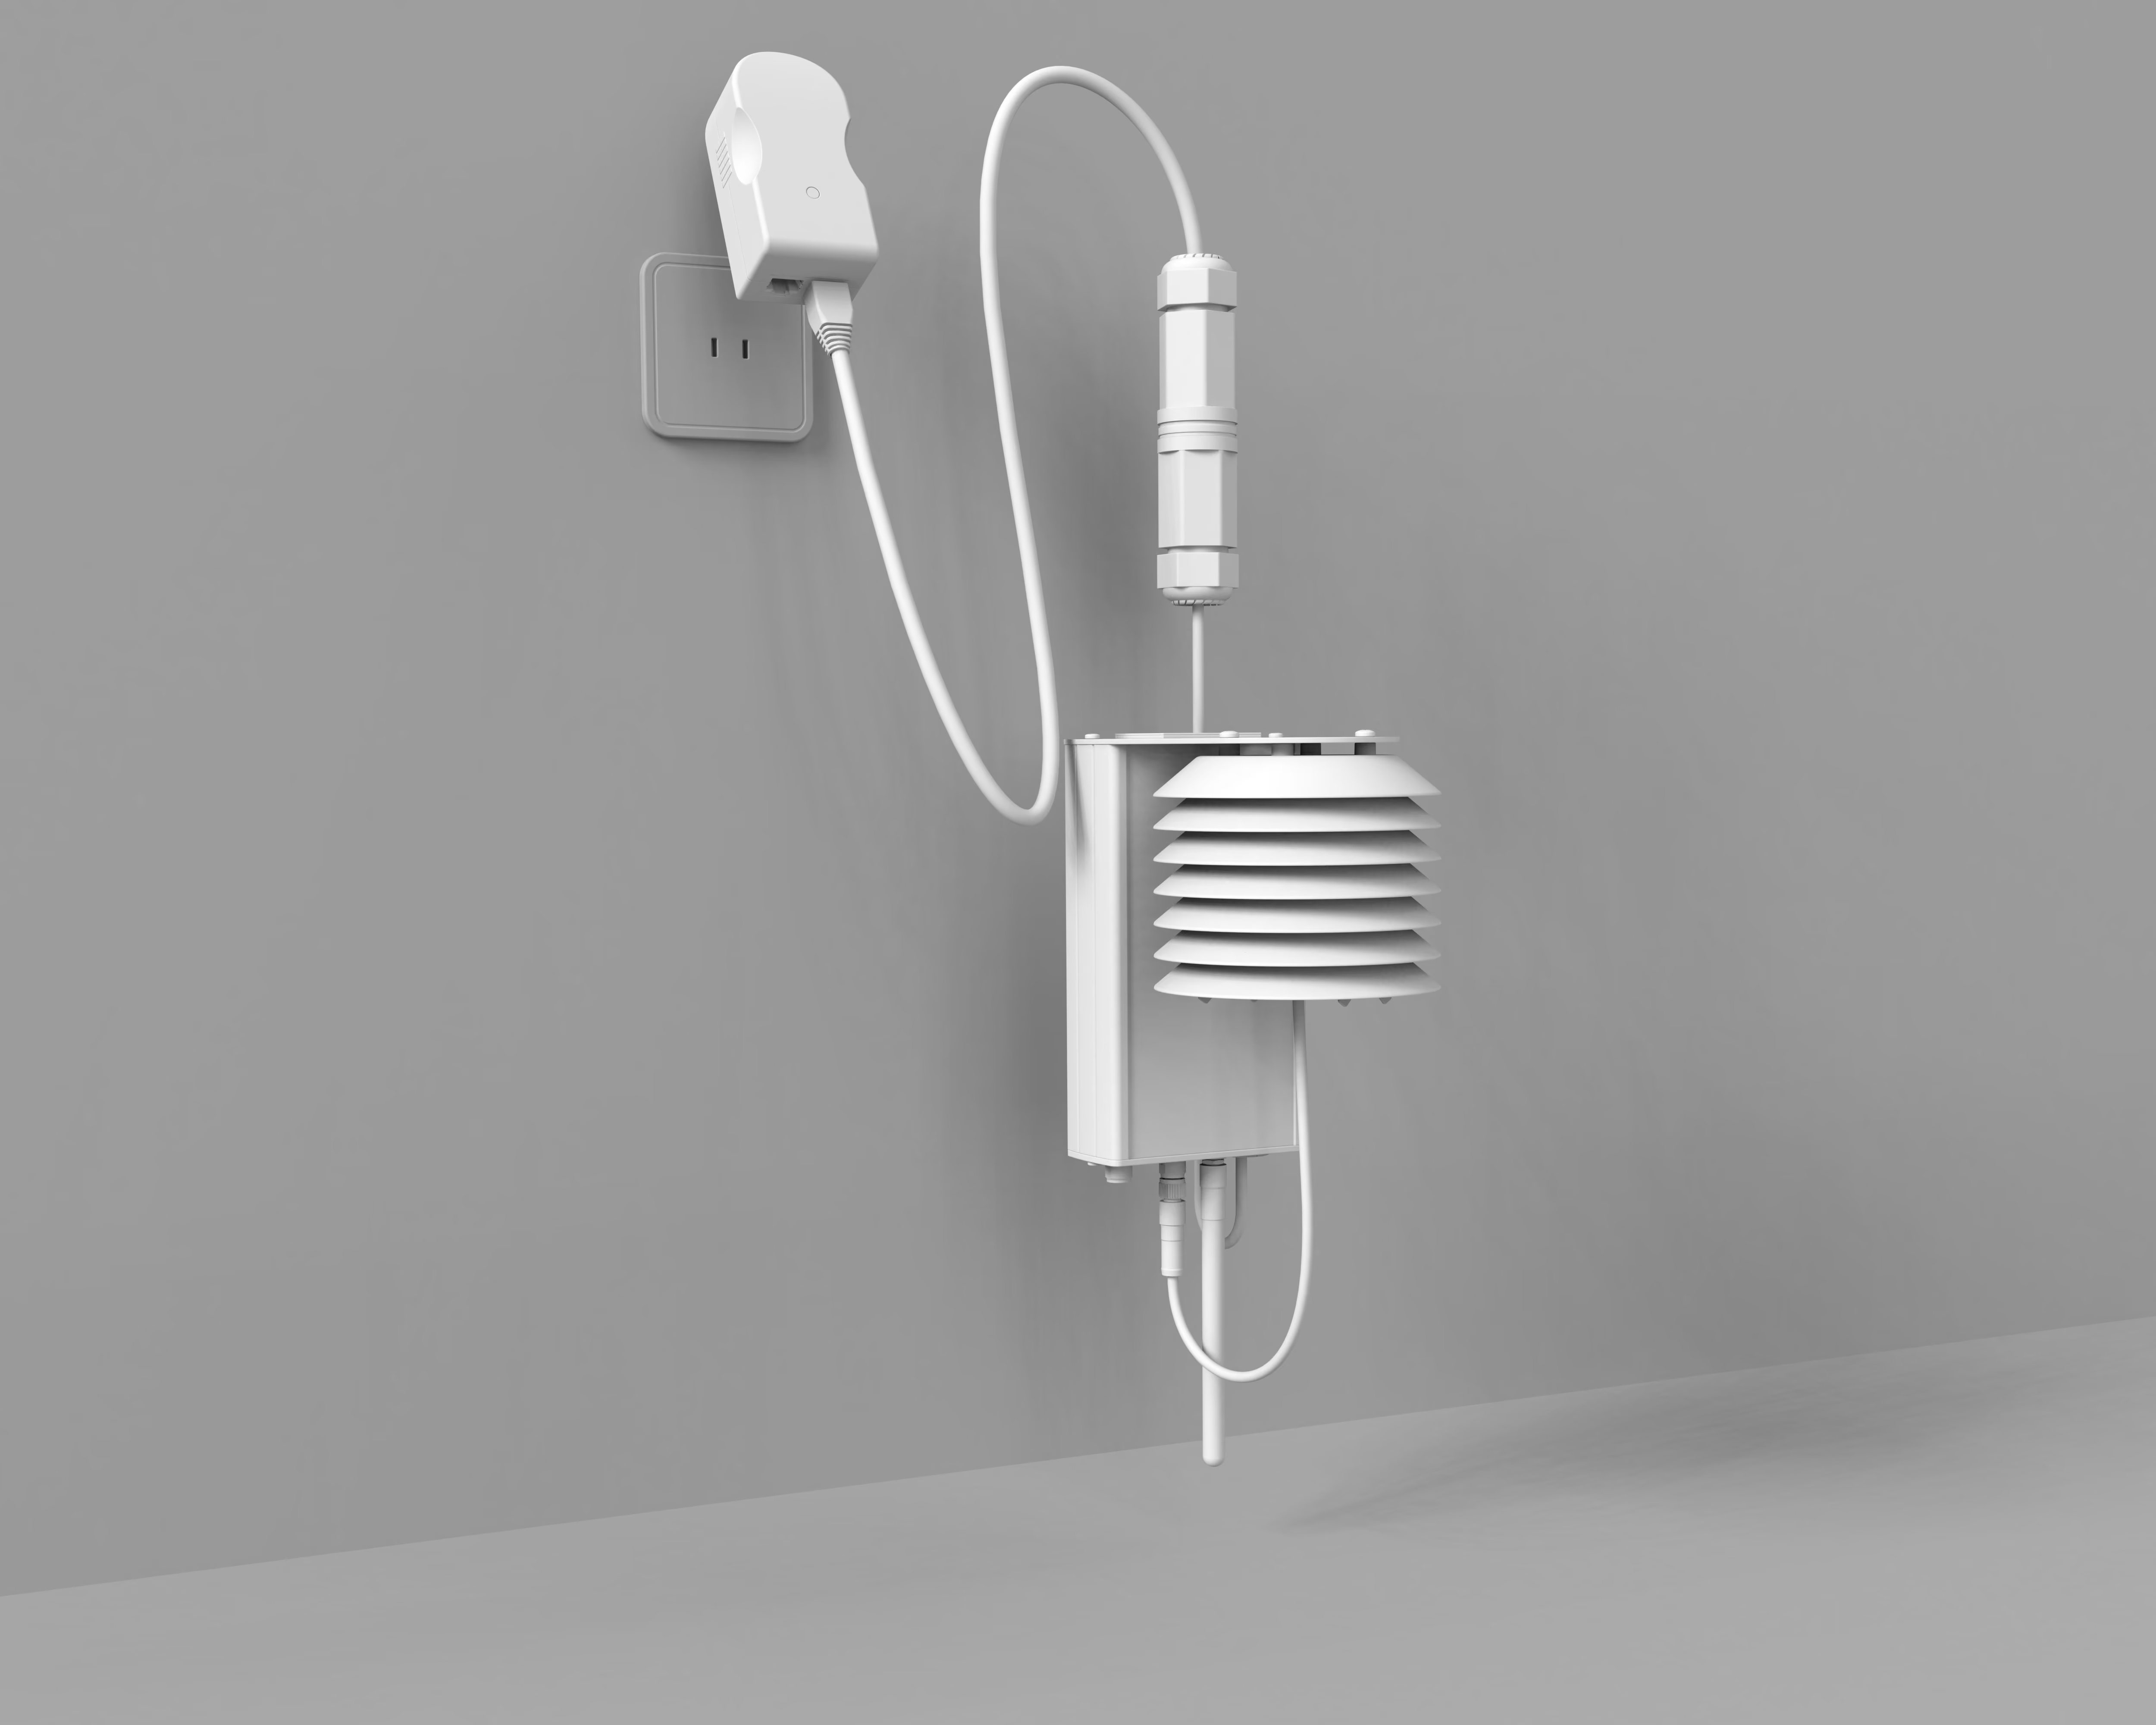
Connection diagram showing an Ethernet cable plugged from the AROYA Climate Station into the PoE/Power Out port on a Power over Ethernet (PoE) wall plug connected to a 110V outlet.AROYA Climate Station with a louvered sensor housing mounted on a wall, connected by Ethernet cable to a PoE power adapter plugged into a wall outlet.
  1. Plug Climate Station into “PoE/Power Out” on Provided Power over Ethernet (PoE) wall plug
  2. Plug PoE plug into wall 110V outlet
STEP 03

Turn on sensor noses

Note: This step is only applicable to devices with a button. These would have serial number starting with H321 or H331.

  1. Press the button repeatedly until a green LED blinks once.
STEP 04

Activate devices in AROYA
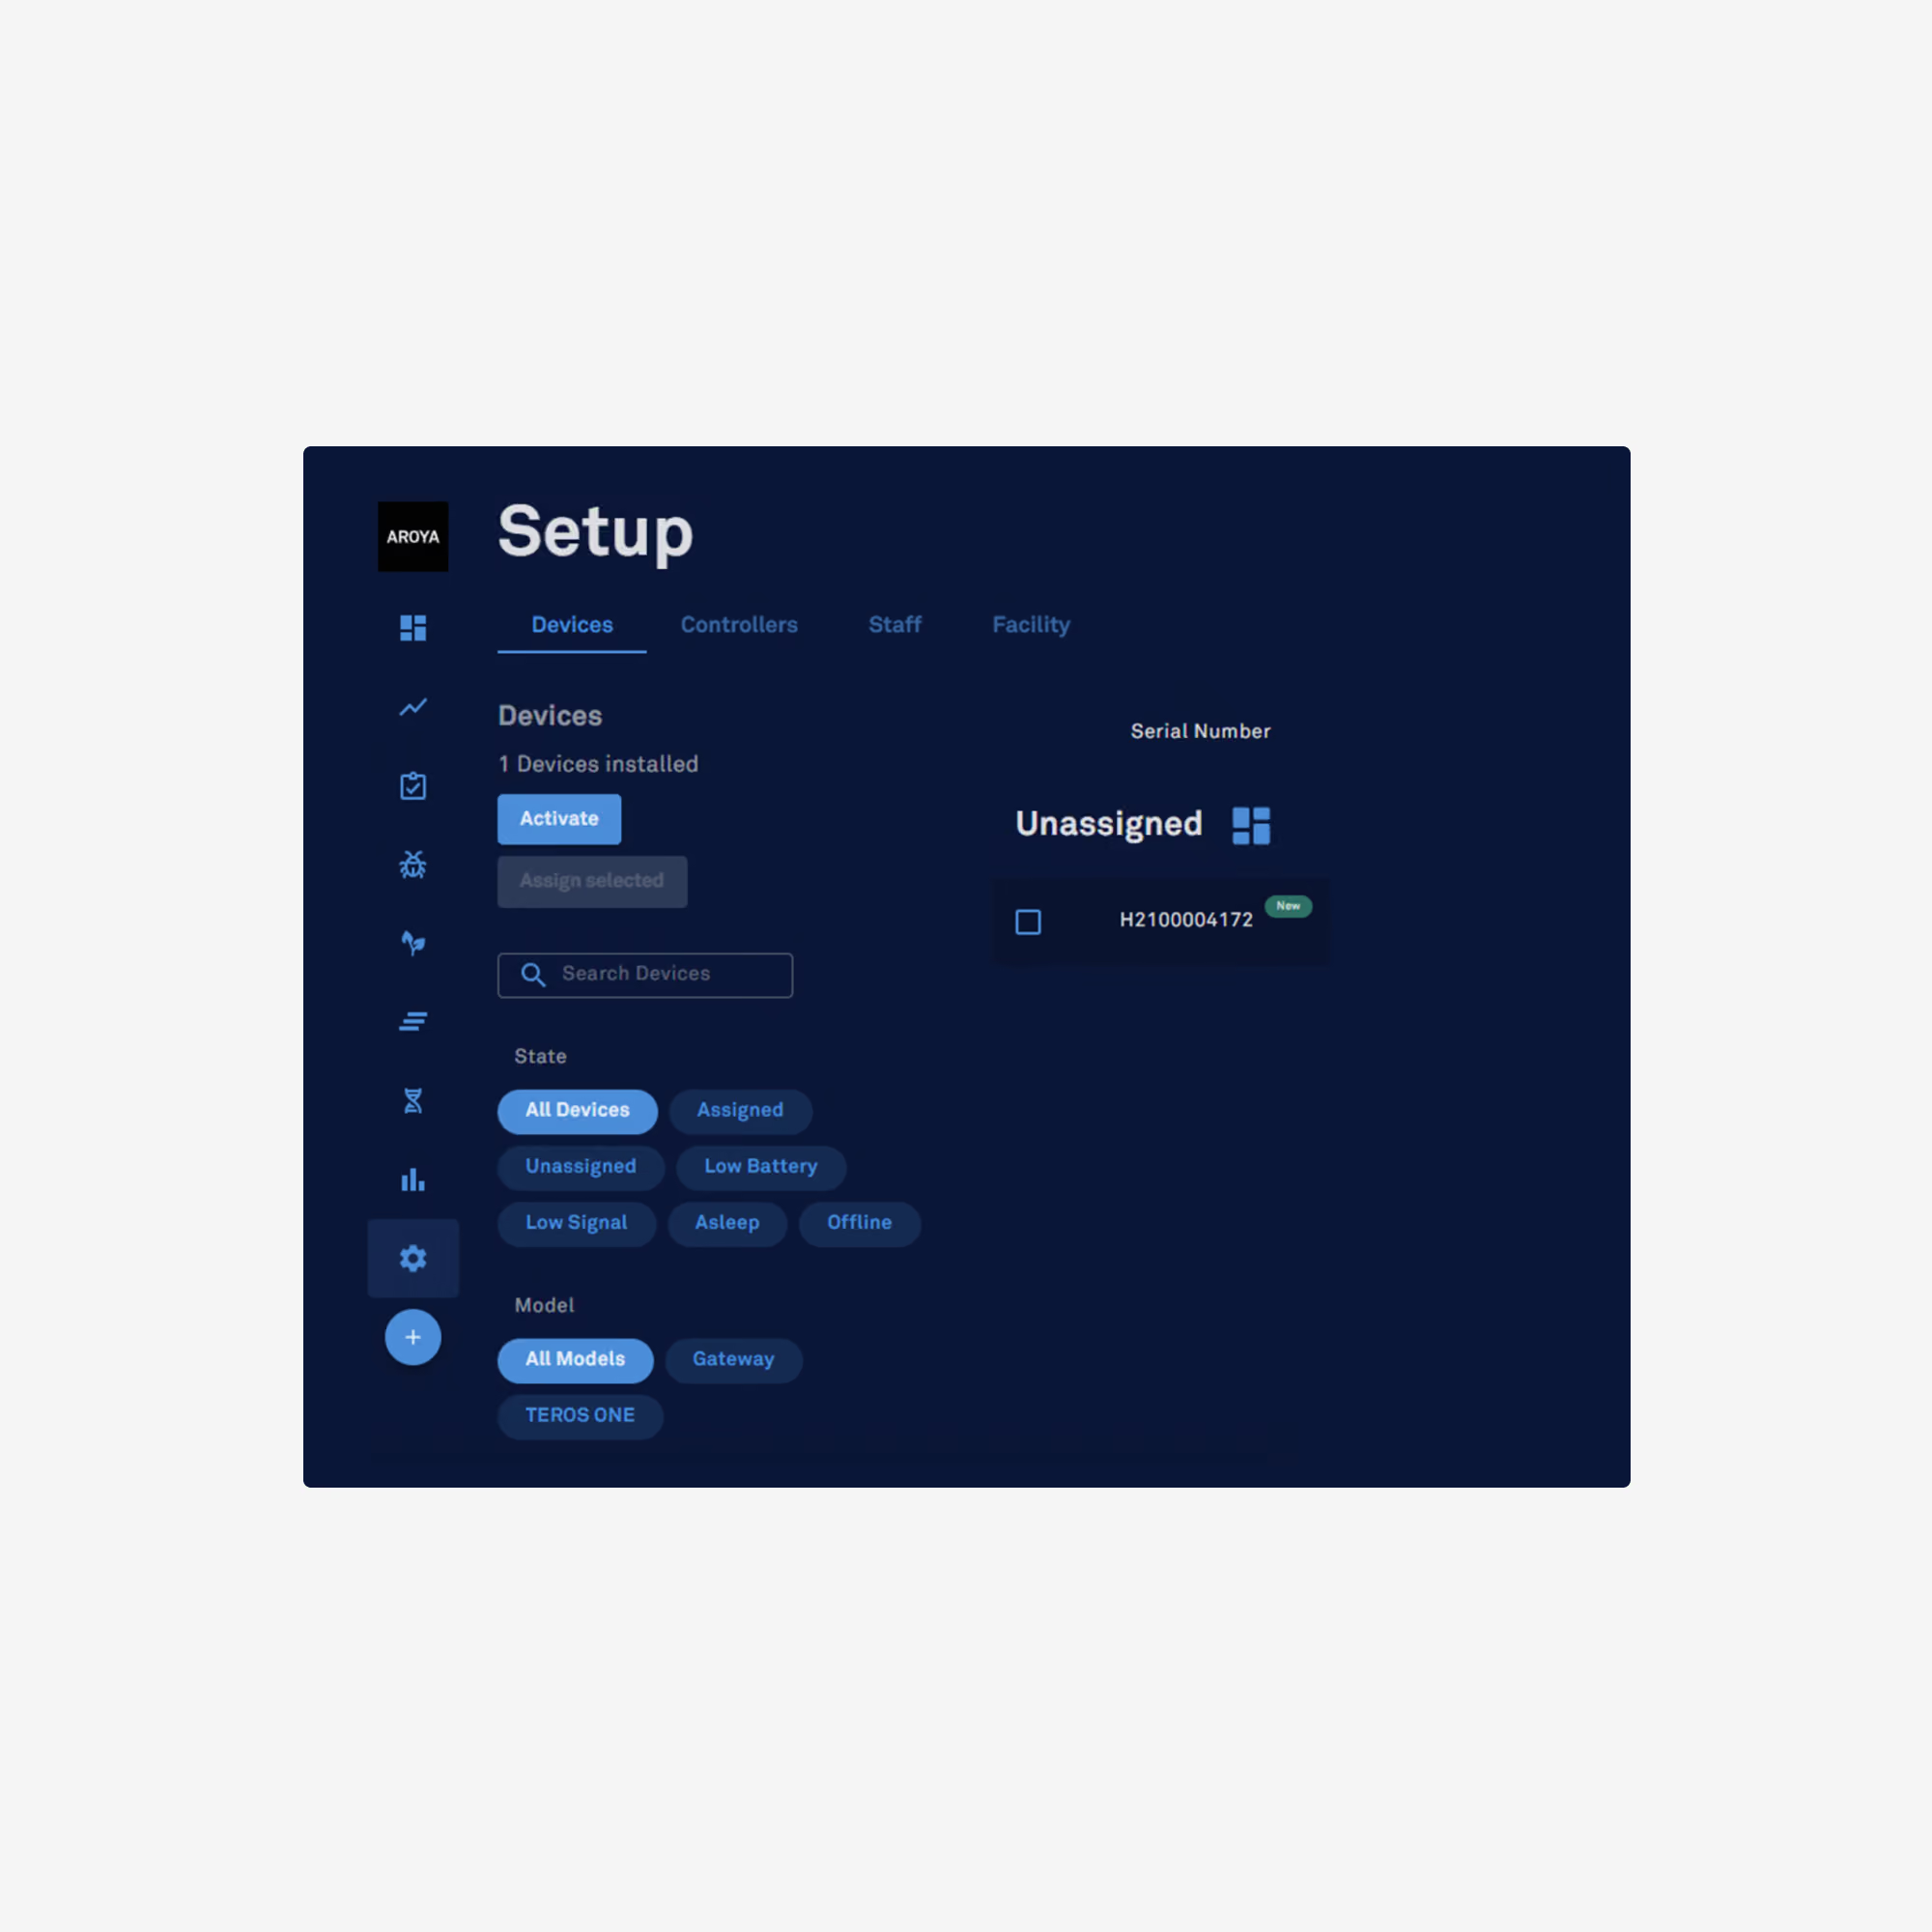
AROYA dashboard navigation menu with the Setup gear icon expanded and the 'Activate' option highlighted.
  1. Click the Gear Icon for Setup
  2. Click “Activate”
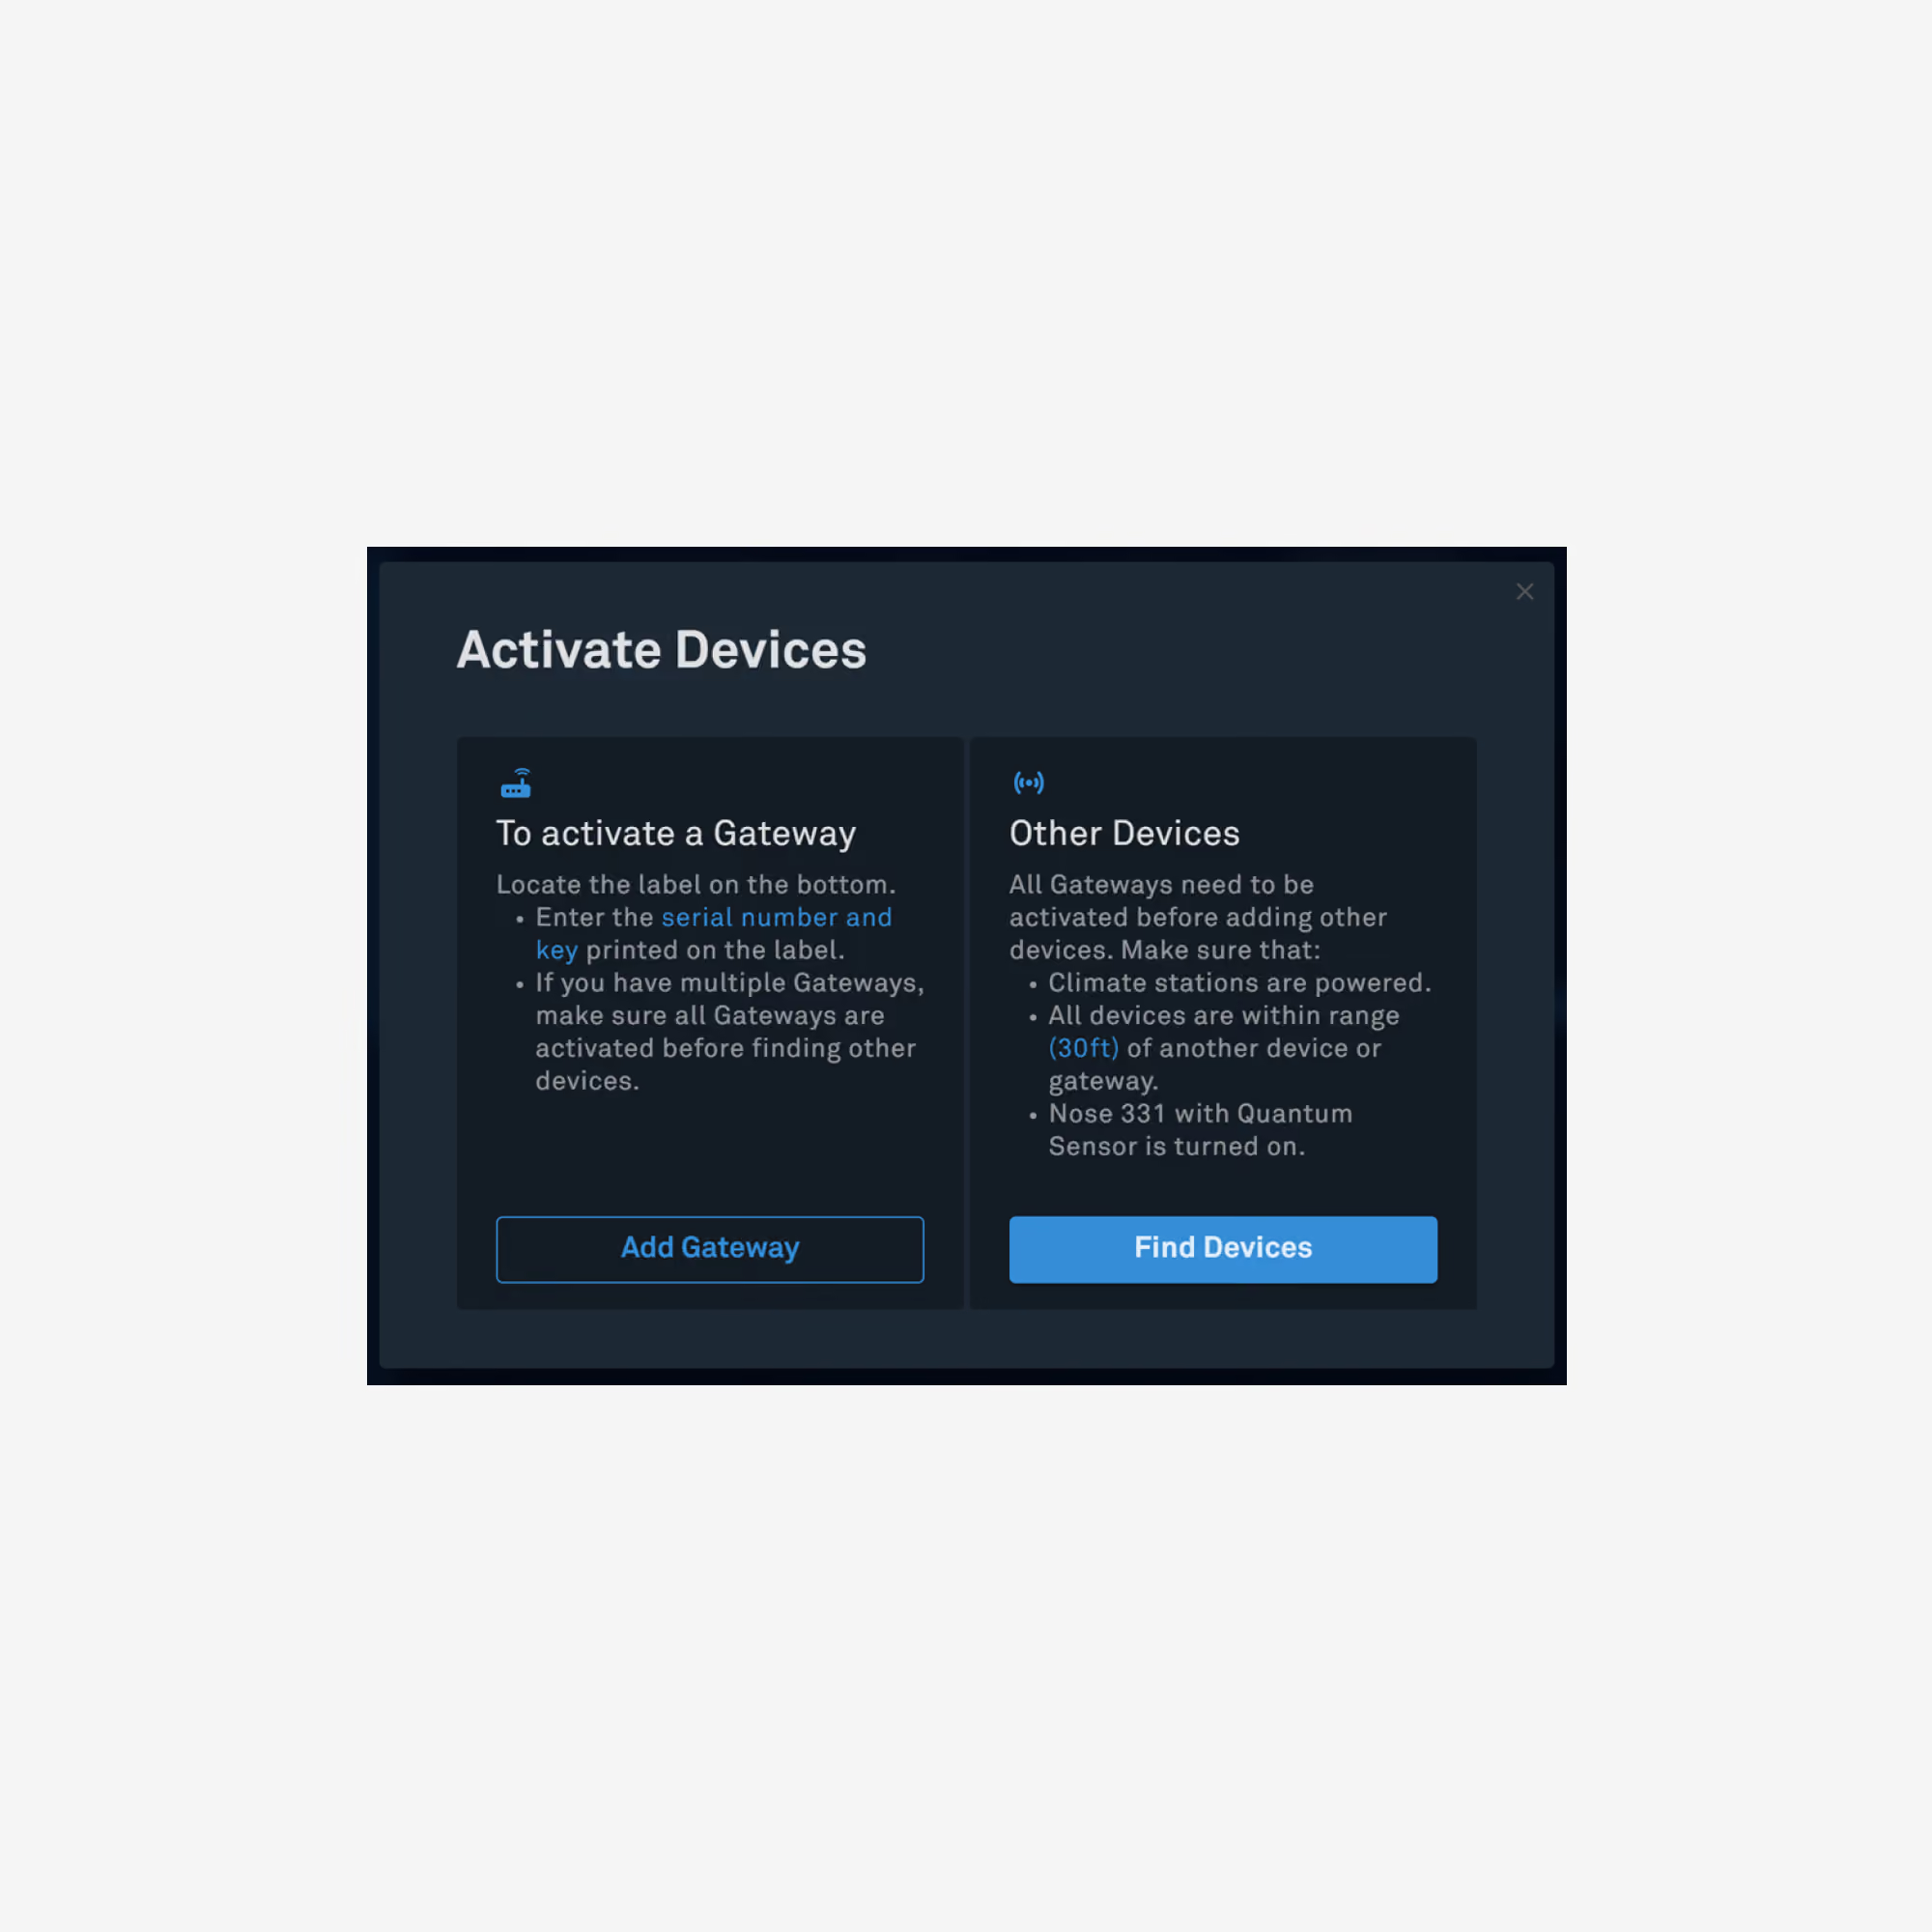
AROYA 'Activate devices' modal showing the 'Other devices' panel on the right with the 'Find devices' button.
  1. Click “Find Devices”
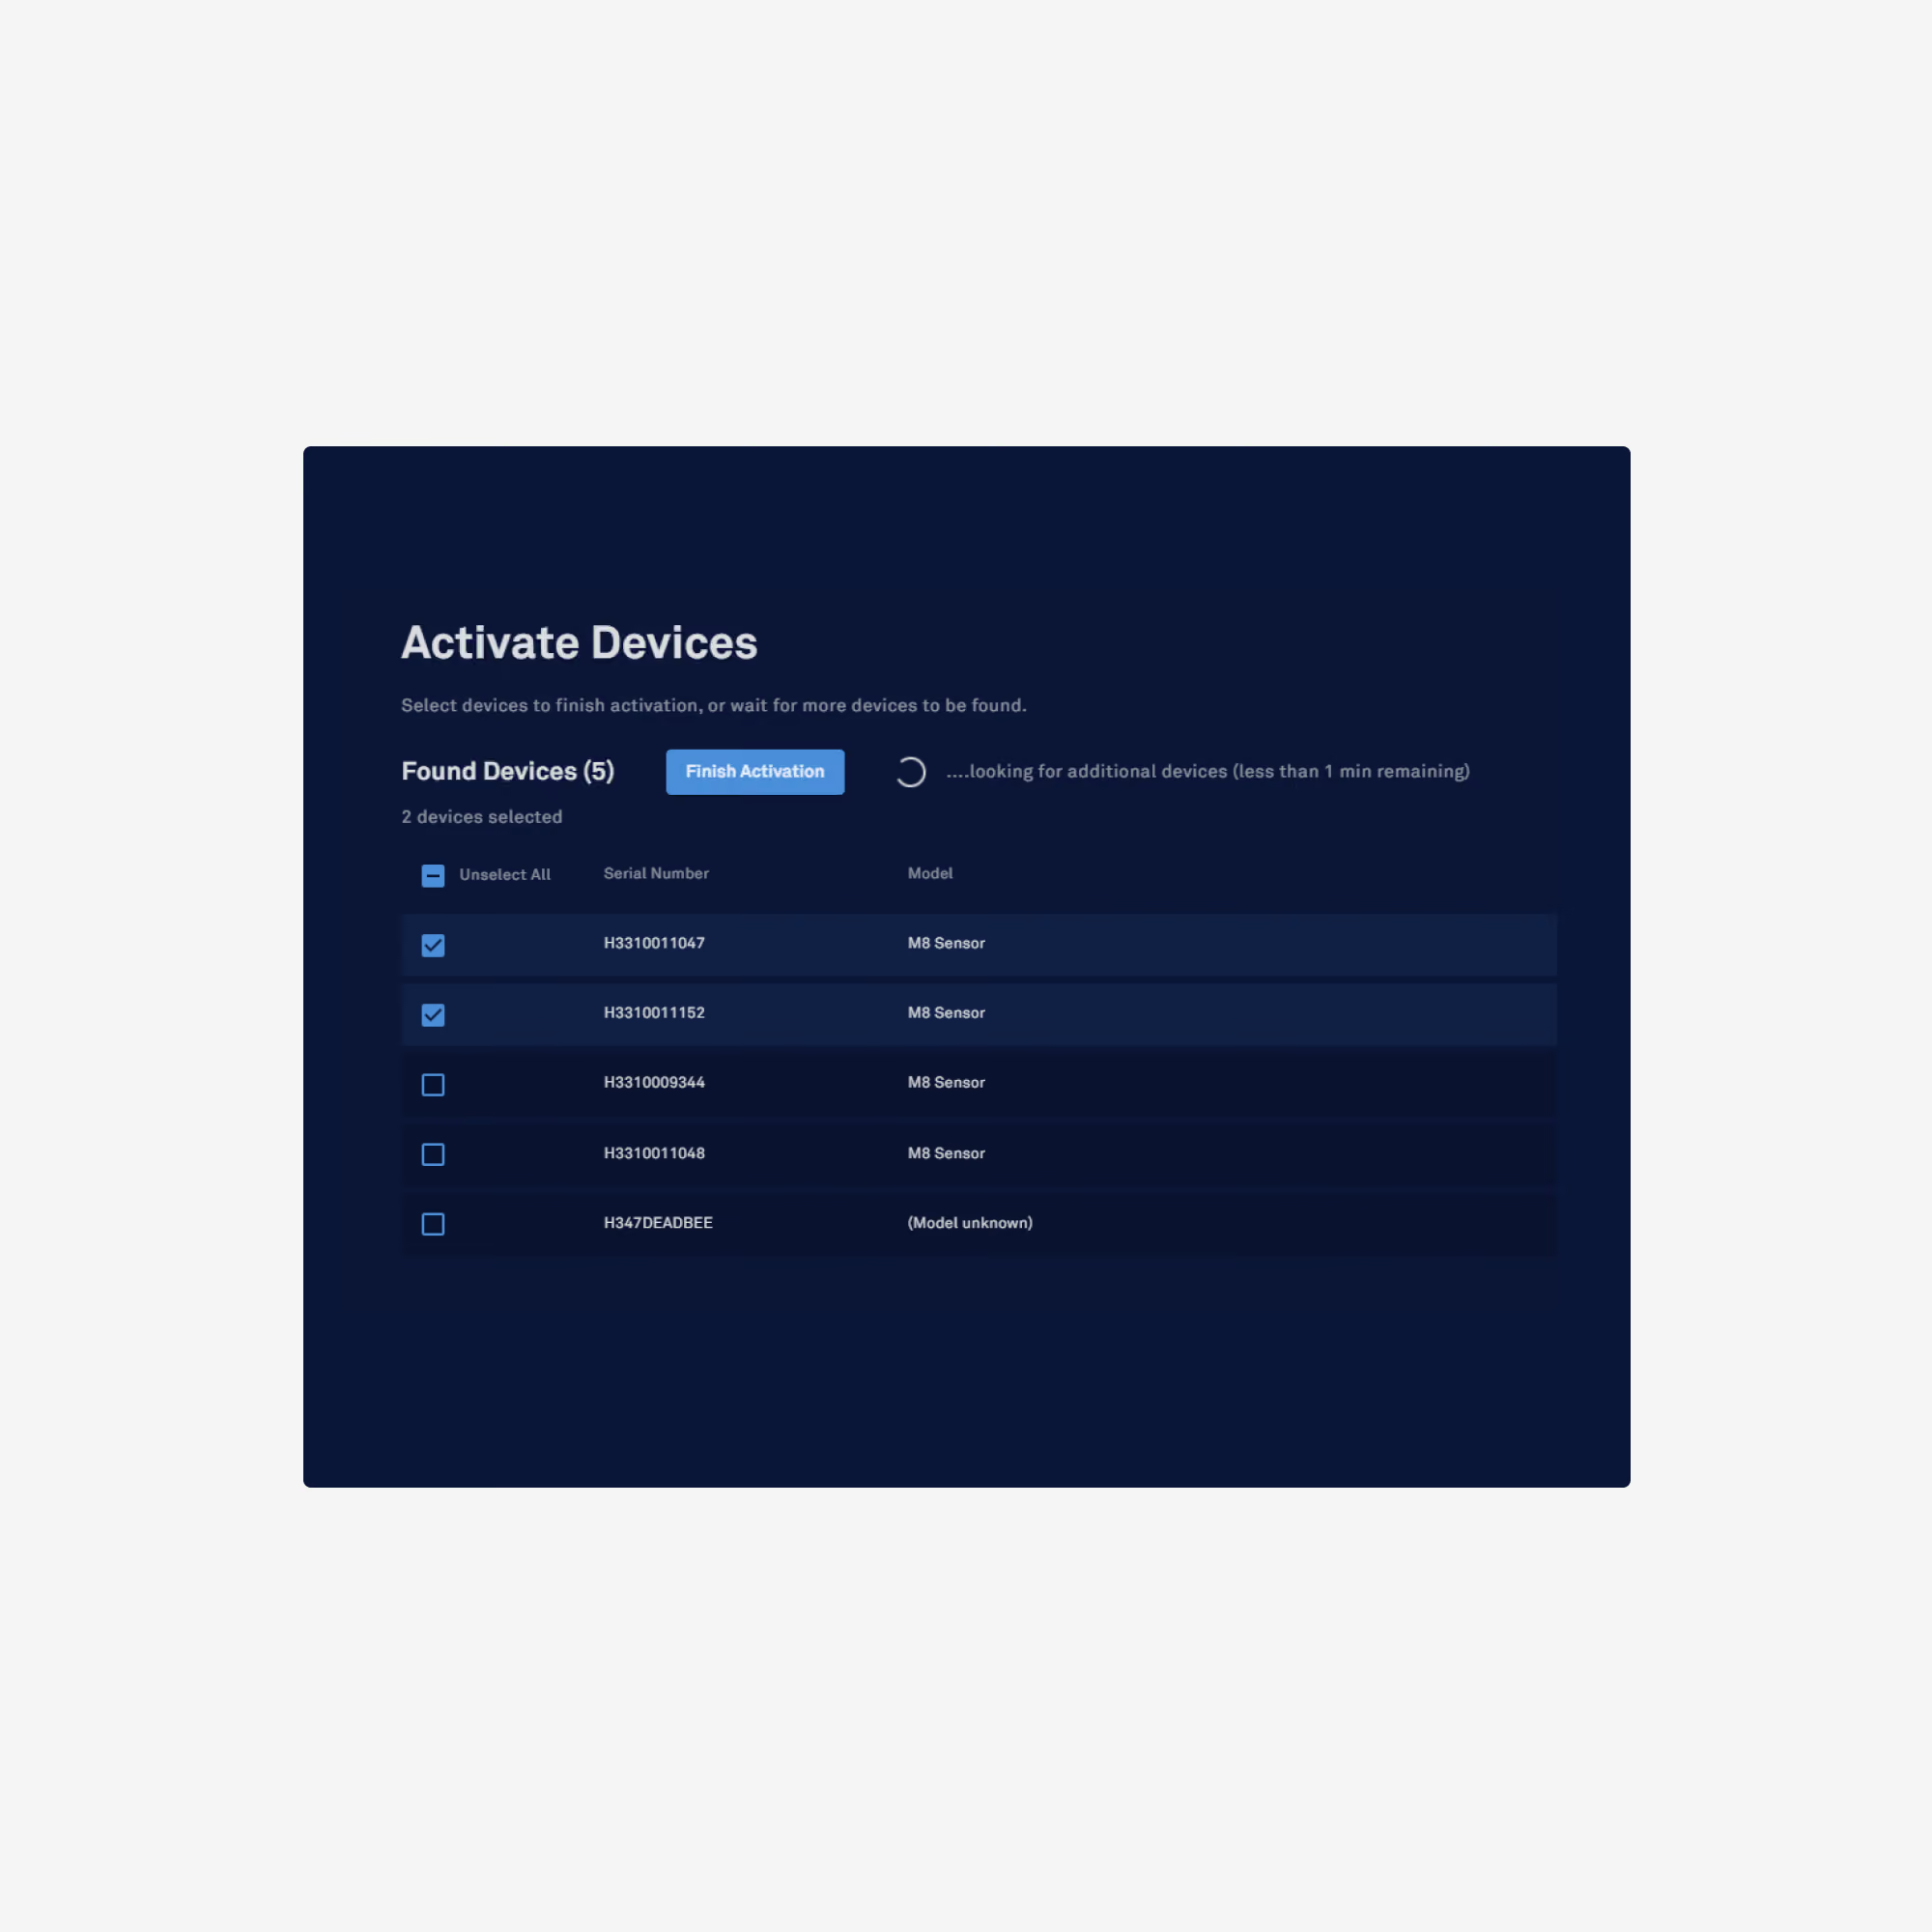
AROYA 'Activate devices' screen displaying a list of discovered sensors with checkboxes selected and the 'Finish activation' button at the bottom.
  1. Select sensors to activate
  2. Click “Finish activation”

Tip: If some devices aren’t found, click “Search again”

Still have questions?

We can help! Reach out to our support team.

Contact support